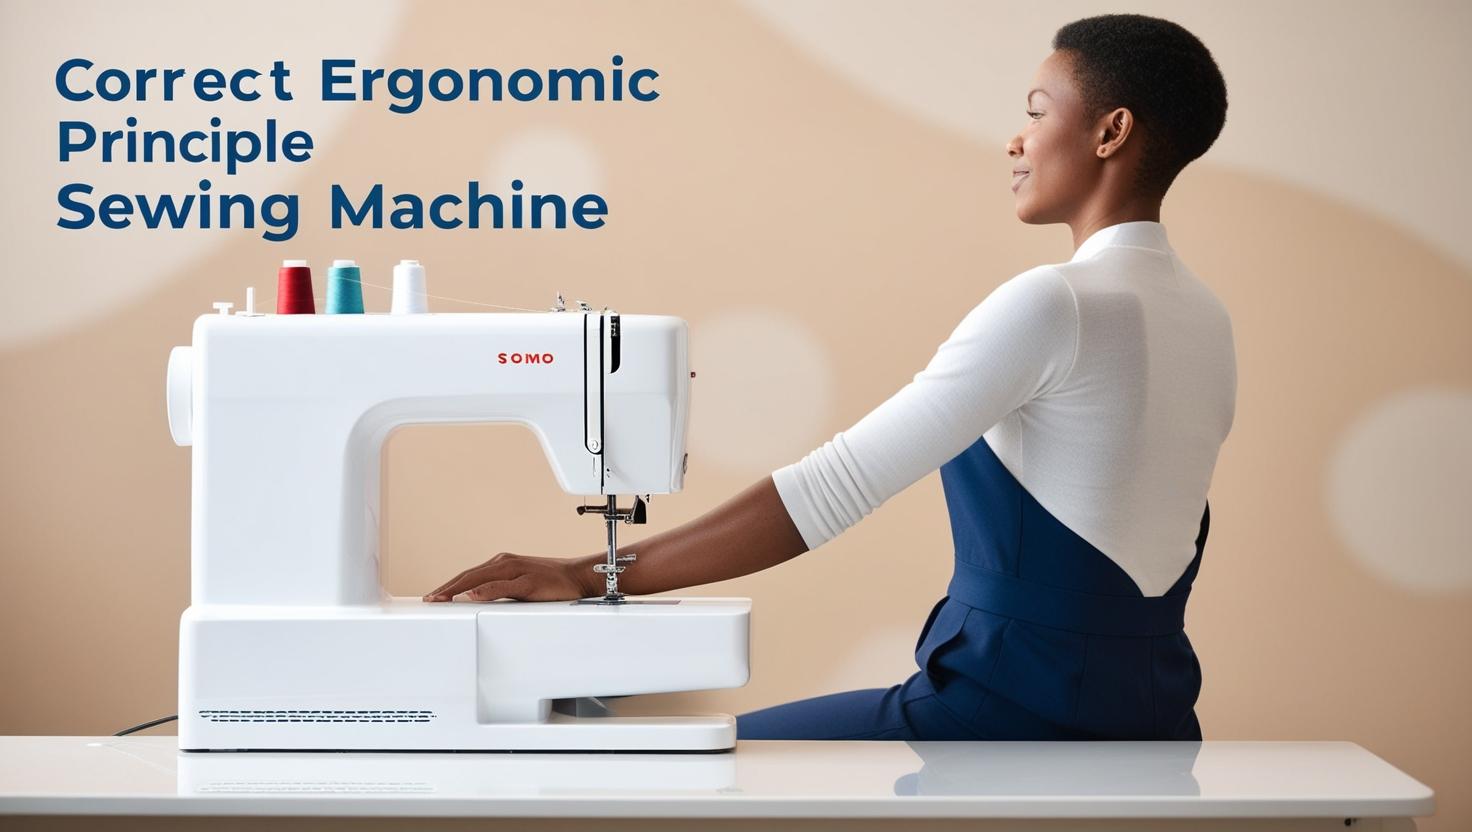
Maintaining the correct posture while sitting at a sewing machine is essential for both comfort and productivity. Whether you’re sewing for leisure or professionally, improper posture can lead to fatigue, discomfort, and even long-term musculoskeletal issues. Here are some key guidelines to help you maintain a proper seating position while working at your machine, with technical details to optimize your setup.
1. Chair Height and Type
A comfortable chair is crucial for good posture. Here’s how to set it up:
- Adjustable Height: Use a chair with adjustable height to ensure that your feet are flat on the floor. Ideally, your knees should be at a right angle (90 degrees), which promotes better circulation and comfort. The height of your chair should allow your thighs to be parallel to the floor.
- Back Support: Choose a chair that offers good back support. The back should be padded and straight, providing support for your lower back. Ideally, the chair should have lumbar support to maintain the natural curve of your spine. Avoid overly cushioned chairs that don’t offer adequate support, as they can lead to poor posture over time.
2. Table Height
The height of your table is equally important.
- Elbow Angle: Adjust the height of the table so that when your hands are on the machine, your elbows form a 90-degree angle. This ensures that your arms are not strained while working.
- Comfortable Reach: Position the sewing machine at a height where you can operate it comfortably without hunching your shoulders. This prevents shoulder strain and promotes good posture. The optimal height is usually between 28-30 inches (71-76 cm), but this can vary depending on your body height.
3. Foot Pedal Position
The foot pedal should be positioned where you can easily reach it without having to stretch or shift your body.
- Comfortable Reach: Position the pedal so your foot can rest flat on it, with the ankle in a neutral position. This helps you control the speed of the machine comfortably and reduces ankle strain.
- Foot and Ankle Alignment: Your foot should be able to press the pedal with ease, allowing for smooth adjustments in sewing speed without overstretching.
4. Back and Shoulder Position
Maintaining the right back and shoulder alignment is essential for reducing muscle tension.
- Sit Up Straight: Sit with your back straight and your shoulders relaxed. Avoid leaning forward, as this can strain your back and neck muscles.
- Rest Against the Backrest: Ensure that your back is supported by the chair’s backrest. This helps maintain an upright posture without putting extra pressure on your spine. Keep your shoulders back and avoid slouching.
- Relaxed Shoulders: Keep your shoulders level and relaxed throughout your work to prevent tension buildup.
5. Hand and Wrist Position
Proper hand and wrist positioning is vital to avoid strain and injury.
- Neutral Hands and Wrists: Keep your hands and wrists in a neutral position, avoiding excessive bending. When sewing, try to move your hands and arms instead of bending your wrists too much. This reduces the risk of developing repetitive stress injuries, like carpal tunnel syndrome.
- Avoid Strain: Keep wrists in a straight line with your forearm, minimizing any bending while using the sewing machine.
6. Leg Position
Legs also play a key role in maintaining overall posture.
- Feet Flat on the Floor: Keep your feet flat on the floor or use a footrest if needed. This helps maintain balance and keeps circulation flowing properly.
- Right Angle Knees: Ensure that your knees are bent at a 90-degree angle, with your thighs parallel to the floor. Your knees should not be pressed against the underside of the table, which could cause discomfort or restrict blood flow.
7. Head and Neck Position
Proper head and neck positioning can prevent strain on your neck and shoulders.
- Neutral Neck Alignment: Position your sewing machine so that you can easily look at your work without bending your neck excessively. A 15 to 20-degree tilt of your head forward is typically comfortable, but avoid tilting your head downward for long periods.
- Avoid Neck Strain: Keep your head and neck in a neutral, relaxed position. If you need to look closely at your work, try moving your body closer to the machine instead of bending your neck.
8. Lighting
Good lighting is crucial for reducing eye strain and improving visibility, particularly for detailed work.
- Required Lux Levels: The recommended lighting level for sewing is between 300-500 lux for general task lighting. For more detailed work, such as stitching or embroidery, aim for around 1000 lux. This ensures sufficient brightness to reduce eye strain and increase visibility.
- Lighting Type and Angle: Use LED task lamps with adjustable brightness to illuminate your sewing area clearly. Position the lamp to avoid casting shadows over your work, and ensure the light is evenly distributed. Positioning the light at about a 45-degree angle to your work surface is often ideal.
- Daylight Simulation: If working for long hours, consider using lighting that mimics natural daylight (5000-6500K color temperature) to reduce eye strain and enhance focus.
9. Take Regular Breaks
Even with proper posture, sitting for long periods can still lead to discomfort.
- Stretch and Move: Take regular breaks to stand up, stretch, and move around. Stretch your hands, wrists, back, and shoulders to relieve any tension that has built up. A short break every 30-60 minutes is beneficial for maintaining circulation and muscle health.
- Reset Your Posture: Standing and stretching periodically helps reset your posture, allowing you to return to your sewing task feeling refreshed.
Conclusion
By following these posture tips and considering the technical details for optimizing your workspace, you can enhance your comfort, reduce the risk of strain, and improve your productivity while working at a sewing machine. Whether you’re working on a small project or a large-scale design, proper ergonomics and well-optimized lighting are essential for long-term success and well-being.


